Video and USB Connectors Library
Posted: 2013-February-25 Filed under: ADC adapter | Tags: ADC, CadSoft, DVI, EAGLE, library, Open Source Hardware, OSHW, USB, VGA Leave a comment »And, per the open source hardware requests, here is a ZIP file containing a parts library for CadSoft's EAGLE schematic design software containing an ADC connector, VGA connector, DVI connector, and a few USB connectors. These are missing from the default libraries so one could edit and make their own ADC adapter board.
I had success wiring up the various connectors, but you may need to adjust dimensions to meet DRC requirements with whatever method you are getting circuit boards made. Naturally, there is no warranty with this library.
ADC Adapter: EAGLE Schematic and Board
Posted: 2013-February-24 Filed under: ADC adapter | Tags: ADC, Apple, Apple Display Connector, circuit board, EAGLE, Open Source Hardware, OSHW, schematic Leave a comment »I got a request for the source files for the ADC Adapter board — after all, I indicated the project is open source. So here they are: 2012403ADCAdapter. It's a ZIP containing the schematic and board file for the CadSoft's EAGLE schematic design software. I have since switched to KiCad for all my projects but don't intend to get around to updating this one.
2012-Apr-3 ADC Adapter Board
Posted: 2012-October-18 Filed under: ADC adapter | Tags: ADC, BatchPCB, DVI, OSHW, VGA Leave a comment »After reviewing the boards I got back from BatchPCB, I made a few changes:
- Fix bug where DVI pin 15 (ground) was unconnected. This didn't actually cause a problem in my tests, but it should be connected.
- Increase ratio of documentation (e.g. visible when project is completed, does not apply to placement) to a minimum thickness of 0.01" (0.06" letters at 18% thickness ratio.)
- Move VGA text so it does not run over a via.
- Rearrange central text so it does not run over vias.
- Add bigger polarity marks for the monitor power bypass capacitor set.
This is noted as version "2012-Apr-3" on the silkscreen. You can buy it here.
Glowing Tool Handles
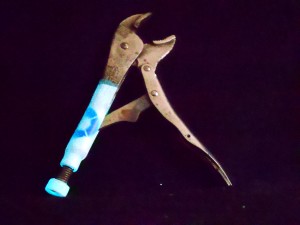
Posted: 2012-August-13 Filed under: Experiments and Testing | Tags: glow-in-the-dark, Kosmic Kreations 1 Comment »I wrote an Instructable titled Glowing Tool Handles that describes how to make Plasti Dip glow-in-the-dark. The glow paint I reviewed earlier did indeed glow very dimly for hours (as explained by the owner of Kosmic Kreations, and it's so dim you can only see it clearly in pitch-black conditions.)
In the mean time, I realized I wanted to make my tools more identifiable so I could loan them out when camping and such and hopefully get them back. I thought it would be an excellent addition to make them glow so I could find them should I be working at night and misplace one. Then I found that Plasti Dip comes in a clear variety (for adding your own color as available in a kit, but you can buy just the clear).
So then the solution was pretty obvious: make a color scheme/stencil to spot my tools easily, add a label with my name, and dip it in (mostly) transparent Plasti Dip embedded with glow-in-the-dark powder (1-2 ounces-weight [25-50 grams] per 10 fluid ounces [0.25 litre] of Plasti Dip). If you want the step-by-step instructions, check out the Instructable.
ADC Adapter Board with Minor Bugs
Posted: 2012-April-3 Filed under: ADC adapter | Tags: ADC, Advanced Circuits, BatchPCB, DVI, ground, Open Source Hardware, OSHW, VGA Leave a comment »I finished up my ADC-DVI-VGA version that fits in an Altoids tin and sent it to BatchPCB. I prefer to use American labor, so I got a quote from Advanced Circuits, but the prices work out: it’s about $400 to start at any quantity (e.g. 10 is about $40 each) down to $10/each for 100. I couldn’t justify it in case (a) there was a bug, and (b) whether I could sell more than 5 to make up for it.
While I was waiting for it, I fiddled around in the design to make sure it was right. I realize I should have checked the design first, and, running the electrical rule check (ERC) I found I had left the DVI connector ground unconnected. D'oh! Fortunately there are half a dozen other grounds which (usually) get all tied together, so I was lucky and when I wired one up, it worked perfectly the first time. (Note that this is the 2012-Feb-29 version with only 4 copies around.)
I'm updating the design and will send it off to BatchPCB and open it up for sale. I'll also post the design files as my intent is for this project to be an Open Source Hardware (OSHW) project.
Glow Inc. Glow-in-the-dark Paint Test
Posted: 2012-March-19 Filed under: Experiments and Testing | Tags: Glow Inc., glow-in-the-dark, Instructable, Krylon Clear Gloss, Nikon Coolpix S3100, paint, Rust-Oleum Reflective, test 9 Comments »As a bicycle builder, I'm always looking for ways to make something unique. Most recently, I am assembling a relatively vanilla daily cruiser, I wanted to give it a little flair, so I was inspired by the Night Bike Instructable by Adobi which uses glow-in-the-dark paint to literally glow in the dark.
I started by purchasing the Glow Inc. Water-Based Glow in the Dark Paint Sample Pack to test what I'd need to do and how well it would work over different surfaces. It comes with one sample each of Glow Inc.'s "White", "Ultra Green V10", "Ultra Blue", "Pure Blue", and "Purple". Glow Inc. claims "glow times" of 24+ hours for Ultra Green V10, 9 hours for Ultra Blue, 2 hours for White, 3 hours for Pure Blue, and 30 minutes for Purple.
I had some EMT conduit lying around so I put on a coat of gray primer and did some tests. On the first, I painted the glow colors in one coat over the gray primer. Since I heard the glow was sensitive to UV, I was curious if clear acrylic would affect charging, so one set was left open and the other covered in two coats of Krylon Clear Gloss Protective Spray Coating. On the second pipe, I painted over the primer with a stripe of cheap black gloss, a strip of clear purple (which didn't show much clearness over the primer), and a strip of bright yellow. On each of the colored stripes, I applied one coat of each color in the sample pack. On the last piece of pipe, I painted a portion with the gloss black then went over most of the plain primer and black with Rust-Oleum 214944 Reflective 10-Ounce Spray, Reflective
to see if it would work better than plain. This time I only applied the "Ultra Green" in one, two, and four coats, and one coat on the plain primer for comparison.
I didn't note a specific need for how long to leave the paint exposed to light so I put them in hazy sun for an hour then brought them in. My initial reaction was that the glow was not particularly bright, although the full containers glowed considerably brighter than a glow-in-the-dark T-shirt I have. On the topmost pipe, darker under-colors indeed appear darker although purple-over-purple seems to work well (I expect that an undercoat of a matching color would work). In the middle pipe, the four-coat paint is brighter than the two coat which is brighter than one coat. Reflective spray yielded virtually no improvement. On the bottom pipe, the clear coating (on the right) did not affect the glow at all.
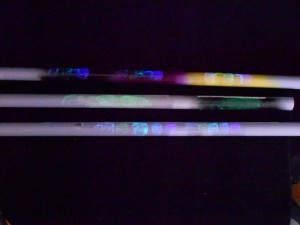
Glow Inc. water-based glow paint samples, freshly charged, photographed in a darkened room (ISO 1600, 1 second exposure, f4.2 on a Nikon Coolpix S3100).
I had done some earlier experiments where I left the paint for 10 minutes and found it completely discharged. Here is a similar result from this specific test after 30 minutes:
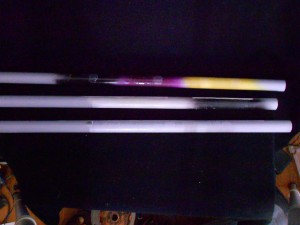
Glow Inc. water-based glow paint samples, 30 minutes after charging, photographed in a darkened room (ISO 1600, 1 second exposure, f3.9 on a Nikon Coolpix S3100).
As you can see, the paint is not glowing at all. Needless to say, I'm extremely disappointed in Glow Inc.'s products and would not recommend them to anyone. I do not know how Adobi achieved jeir results in the Night Bike Instructable, but one commenter did ask why the hour-by-hour series of pictures were only taken minutes apart according to the EXIF data embedded in the images.
Alas, my bike project will need to have some other way to make it unique.
The End of the Bike With 2 Brains
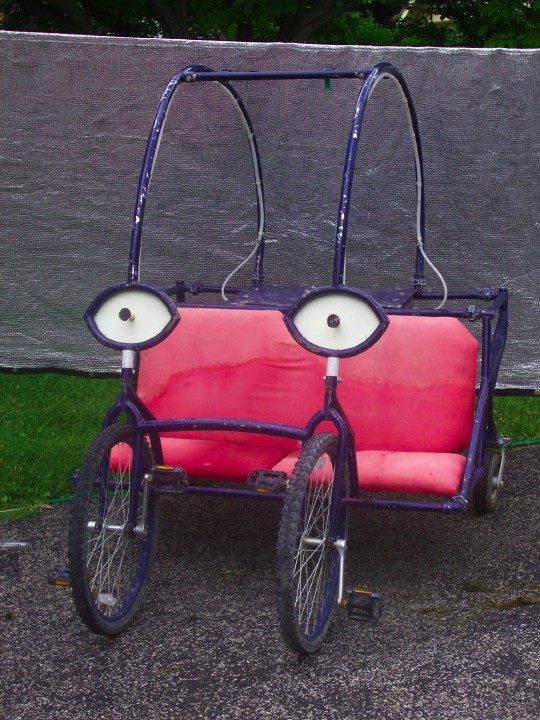
Posted: 2008-June-17 Filed under: Projects, The Bike With 2 Brains | Tags: art, Burning Man, Sawzall, toy Leave a comment »On June 17, 2008 I killed the Bike With 2 Brains.
I've been dragging it to exhibitions and to Burning Man for the last 4 years. It never felt the same as that first year. The reason slowly materialized: I didn't set it free. The first time I brought it to Burning Man, I let it have an adventure on its own by letting people take it wherever they wanted. But on all subsequent exhibitions, I kept it close by. It was a difficult, harrowing experience to try and find it after that first year and I didn't want to repeat it. It would have been possible to add a tracking device, but in a way, I don't think even that would have been satisfying.
So it's been dying a slow, painful death. I killed its soul when I brought it out for the second time and didn't let it run free. It's looked sadder and sadder ever since — going from an experience to a toy. Of course, that's all it really was in the first place: an elaborate toy, but in that initial presentation, I made it art. As egotistical as it seems, I fully believe that to be true. It was a unique, experiential art project that I made.
I couldn't just throw it away — nor could I sell it. I couldn't even give it away — for to whom?: only to someone who would let it live again. I didn't really know what to do with it. I kept meeting people who wanted to see it and I'd occasionally trot it out to show them. The only real exception was my friend Sondra who advised to turn it into something else. Unlike other projects or products, I had a hard time seeing the Bike With 2 Brains as anything but the Bike With 2 Brains. It really permeated my perspective.
I finally decided to step up to the plate. I got out the Sawzall and took one last picture. I said, "goodbye, old friend" and started cutting.
Pieces of its corpse still haunt my garage and basement, but it's all on its way to becoming something else. The seat will be a "portable" loveseat — kind of like a heavy patio furniture that I can bring to Burning Man. One of the front wheels and the back wheel are going to become a rear-steered tricycle — sort of an adult Big Wheels.
As my friend Toni says, "everything is on its way to being something else".

Recent Comments